
- With the background stamp face up, ink the stamp completely by tapping the ink pad on the rubber.
- Place the background stamp face up on your stamping surface.
- Place the card stock on the inked stamp.
- If the card stock is smaller than the stamp, cover the card stock with a piece of scratch paper.
- Rub the card stock with smooth, firm strokes, making sure to rub all areas of the stamp and to keep the card stock from sliding.
- Remove the scratch paper and carefully lift the card stock off the stamp.
QUICK TIP
Create a multicolored background by applying two or more inks to the background stamp.

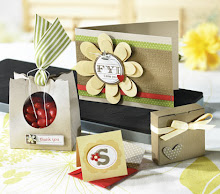
Our Marvelous Markers!
Technique A: Multiple Colors
- Use a marker to apply ink only to the desired parts of the image.
- Add other colors if desired.
- Breathe on the inked image to remoisten the ink with your breath before stamping onto paper.
Technique B: Omitting
- To omit a certain part of a stamp image, use a marker to apply ink only to the desired parts of the image.
- Breathe on the inked image to remoisten the ink with your breath before stamping onto paper.
QUICK TIP
Use a Stamp-a-ma-jig stamp positioner if you want to perfectly align the overlay image.


No comments:
Post a Comment