Here is how she did it:
Masking Tutorial
Masking is a great technique for creating scenes on your cards. The basic idea is to stamp the front images first and then move your way backwards, by masking off the front images. It doesn't take a lot of time, but you do have to be careful when creating your mask.
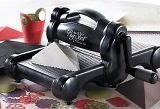
Here's what you need: Stamp-a-ma-jig, imaging sheet, stamps, post it notes, micro-tip scissors, ink and paper.
First stamp your images on the post it notes, making sure you stamp them over the sticky edge.

Cut out your masks, being careful to cut right on the line or even slightly inside it. This is THE most important step to successful masking. If you cut out the image and leave a space outside of the line, you will have a "halo" around your image.
(Note: I only had to make sure the top of the cow was cut out, because that was the only part that needed to be covered.)

Start stamping the images you want in the very front of the focal piece.


Using your stamp-a-ma-jig line up the first image in your second row (or the next one back in your picture).
I only made 3 masks of the cow, so I needed to move them as I worked my way across.
Once you have all you images in place, remove your masks. Some people save them by putting them on top of the sticker on the back of the wood block. Personally I don't think it takes too long to cut them out, so I don't save mine.
Color your image!